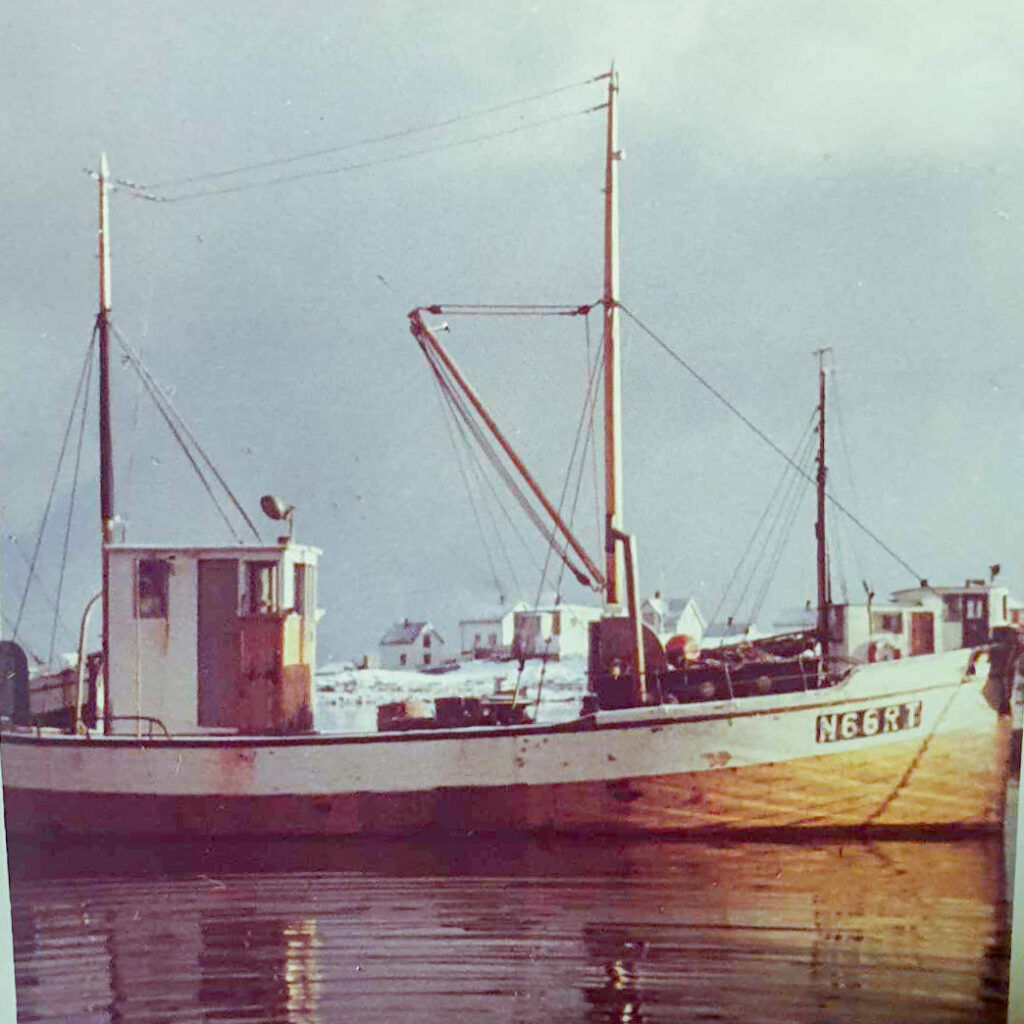
The picture which unexpectedly appeared last Christmas on our old Turid as a fishing boat on Røst in Lofoten piqued my curiosity. I realized that I knew too little about how Turid was actually built and what adventures she had been on.
I started looking for information about North Norwegian fishing boats in general as well as details about Turid and similar boats. I found things like that she was built by Kåre Hansen Sund at Hemnesberget outside the current Mo i Rana. The idea was raised that I should build a model of Turid, a realistic model in a scale of 1:10 which would therefore be just over a meter long.
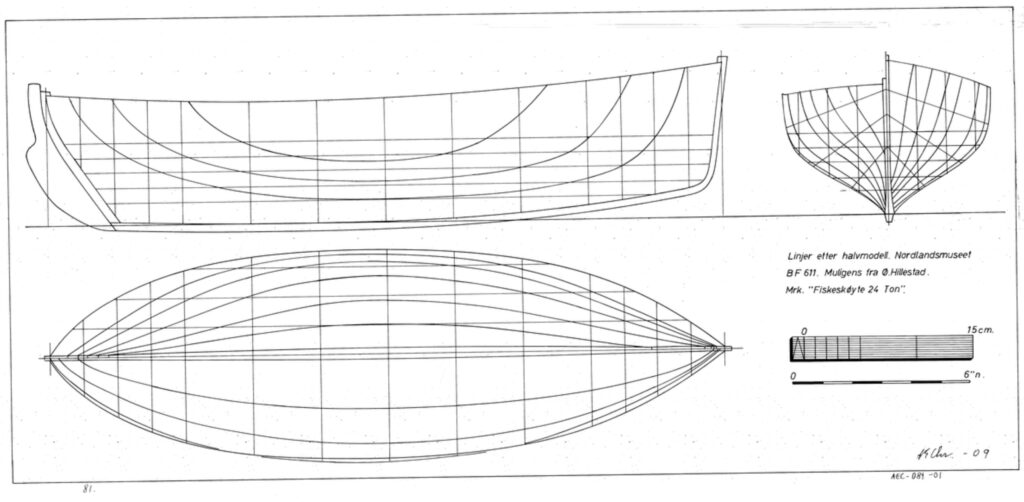
But to build a boat or boat model some kind of drawing is needed and it turned out to be in short supply. Utility boats at that time (1935) were not built according to drawings, it was templates and old traditions that applied.
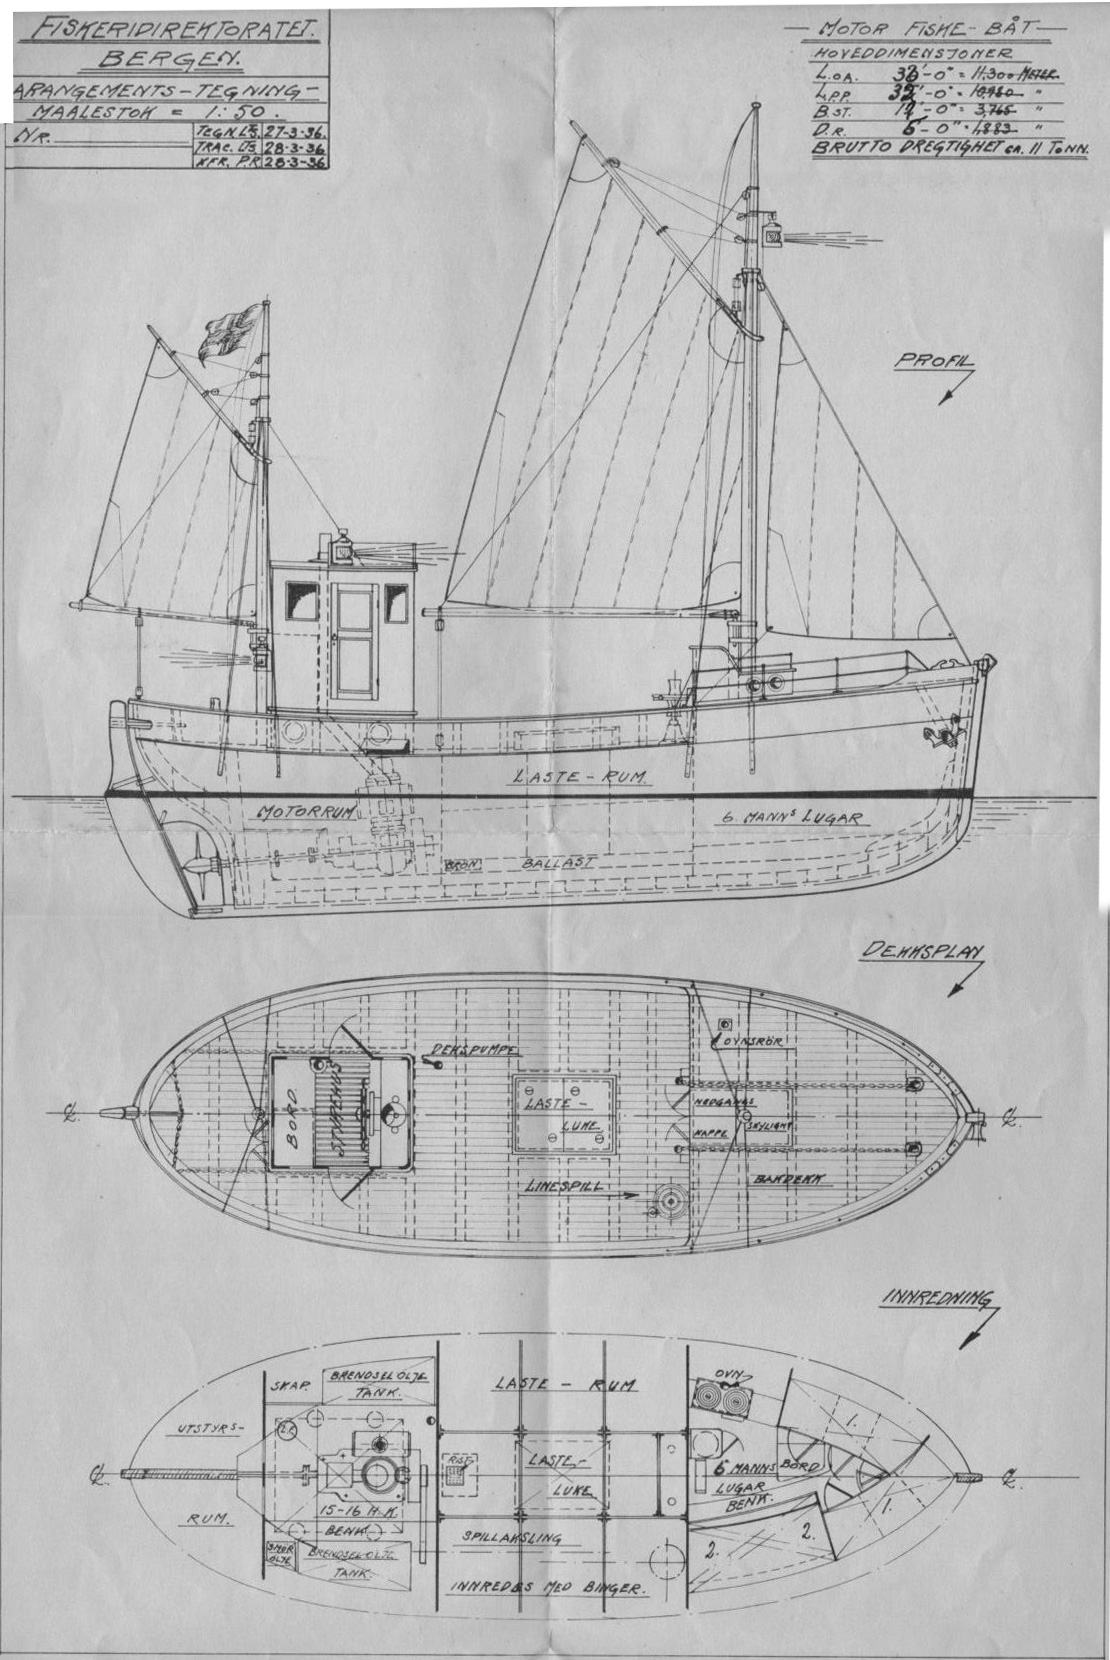
However, I found some drawings, such as the one from the Directorate of Fisheries on a boat of roughly the same size. Good as a starting point but it has no details on the hull form.
Attempt 1
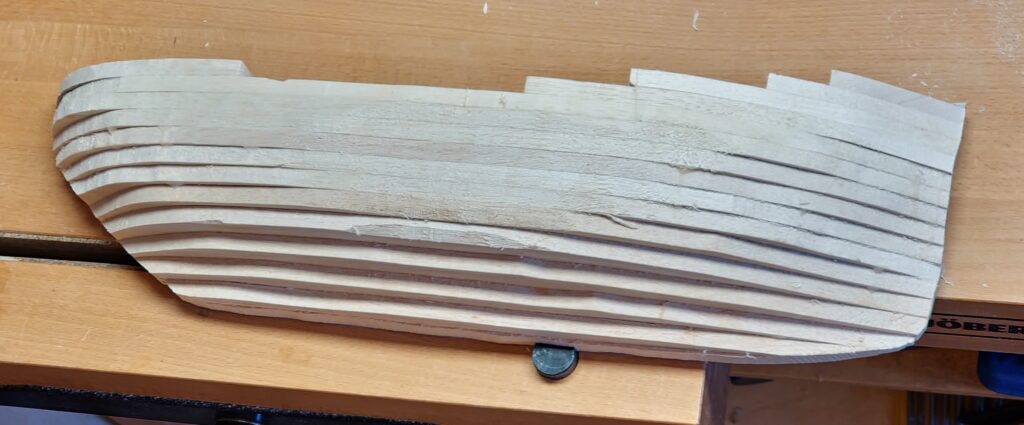
I also found a line drawing with a frame for an older Nordland boat that I thought I would use as a starting point. The line drawing was aligned with side views of the Turid and I began to cut out frames and assemble for testing.
But it didn't turn out well. It was difficult to get the table setting to flow evenly over the frame, there were ugly breaks. After several adjustment attempts that only made it worse, I realized I needed to start over.
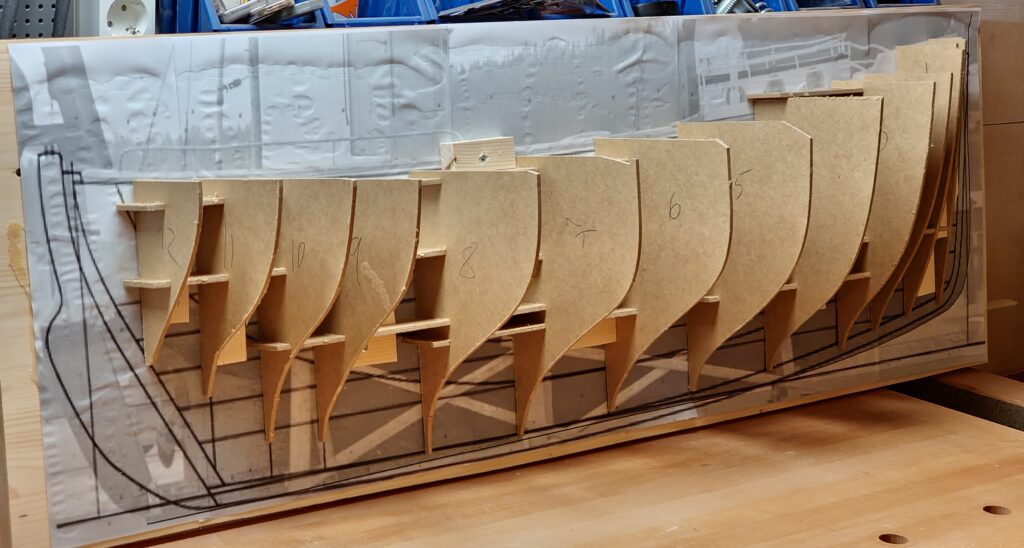
Attempt 2
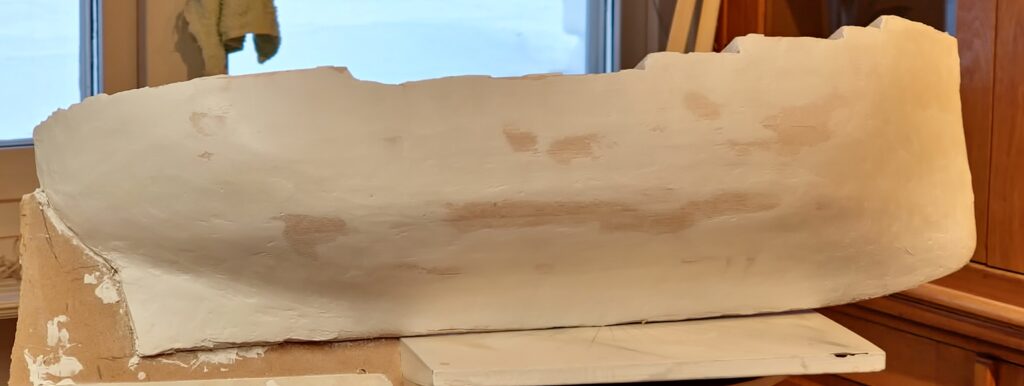
I thought that a classic half-model could be a good starting point. There are many pictures of Turid where the hull shape is clearly visible, so I could form a decent idea of Turid's shape.
I bought balsa that I glued together a block of and then I went loose on it with the rasp. In a fairly short time I had achieved a hull shape that I was satisfied with after a little supplementary puttying.
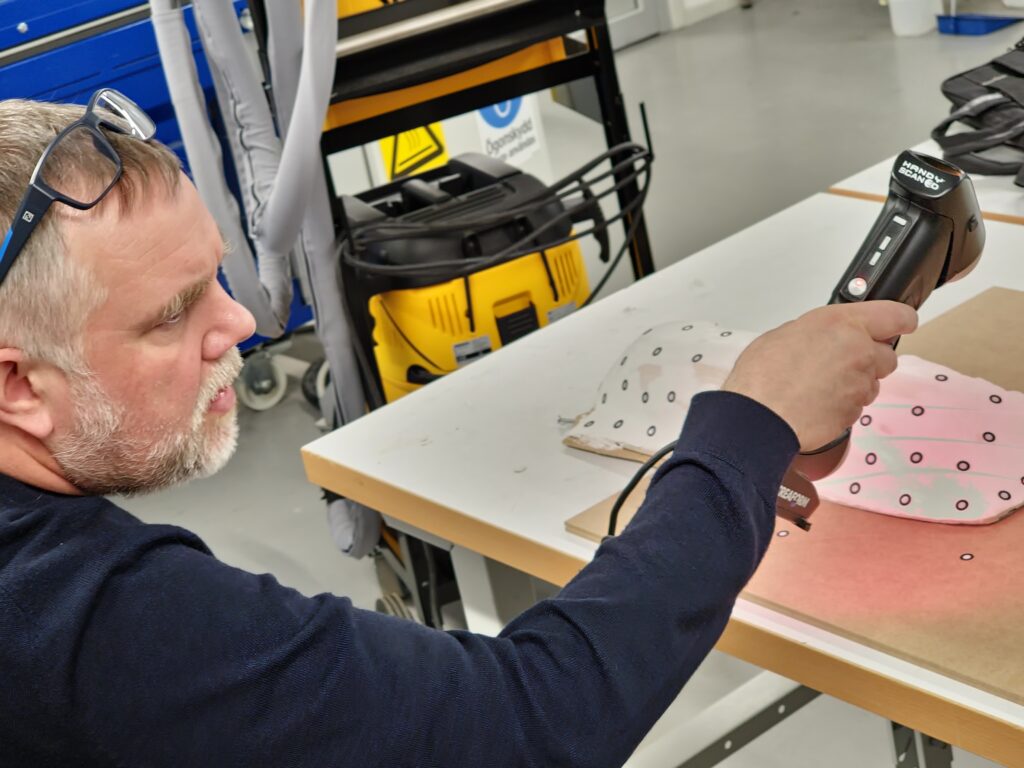
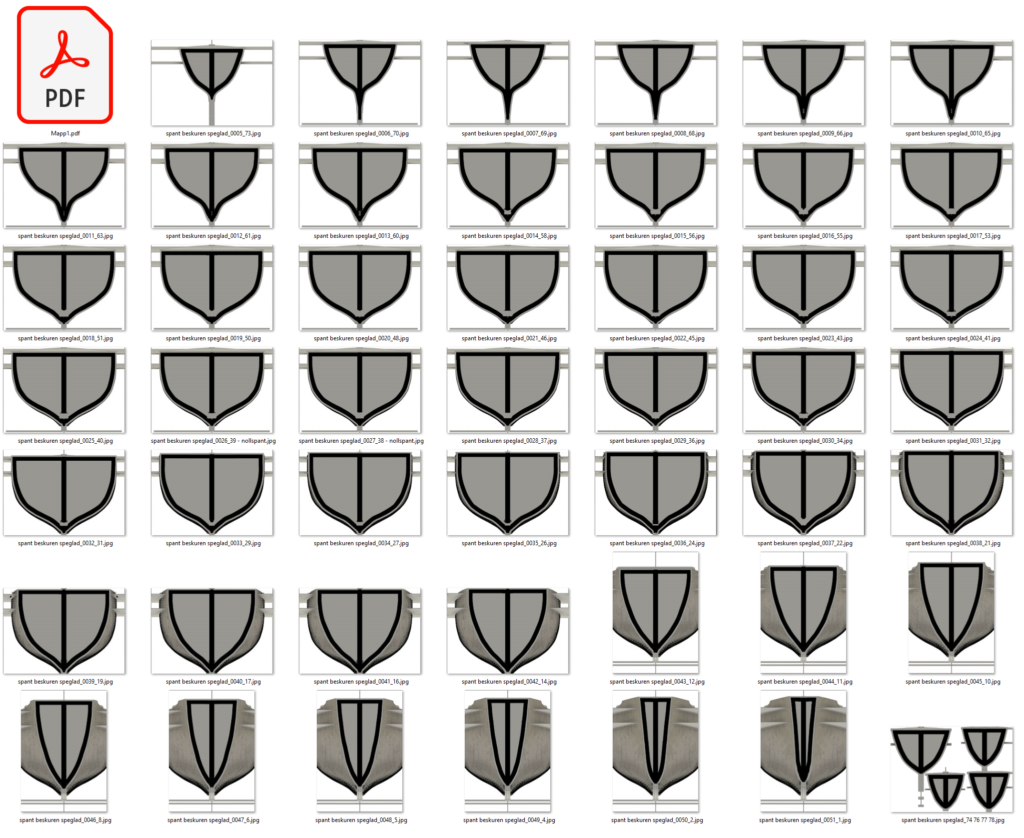
I made the balsa model in half size compared to my planned Turid model, i.e. 55 cm long. Next, I got help with 3D scanning the balsa plug to get it into the computer.
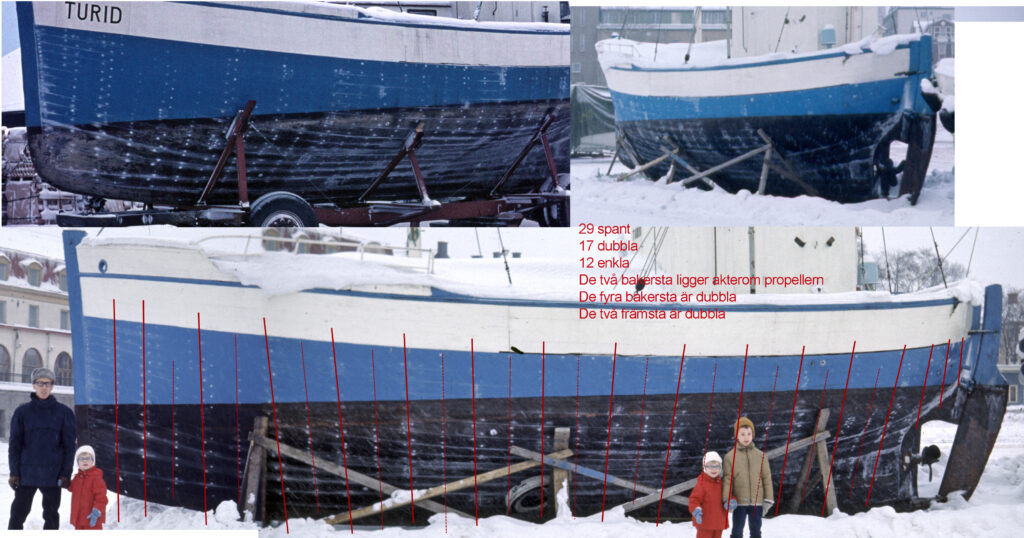
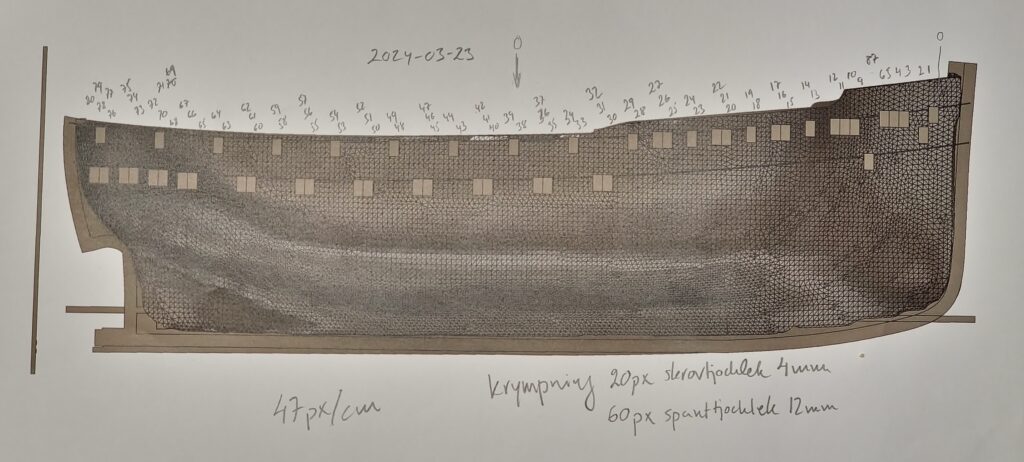
At the same time I studied the image material of Turid. Among other things are there pictures of when Turid was set up on the quay in Örnsköldsvik where frost-covered dots clearly showed where the frames were located - it turned out that every other pair of frames was double and every other single and that the distance between each of the c:a 30 pairs of frames was c:a 36 cm.
That way I could set out the frame positions in my computer model and from there create frame templates, this time well enough.
So now the frame templates are available - the next step is to find the right methodology to produce the frames so that they are both strong and realistic.